

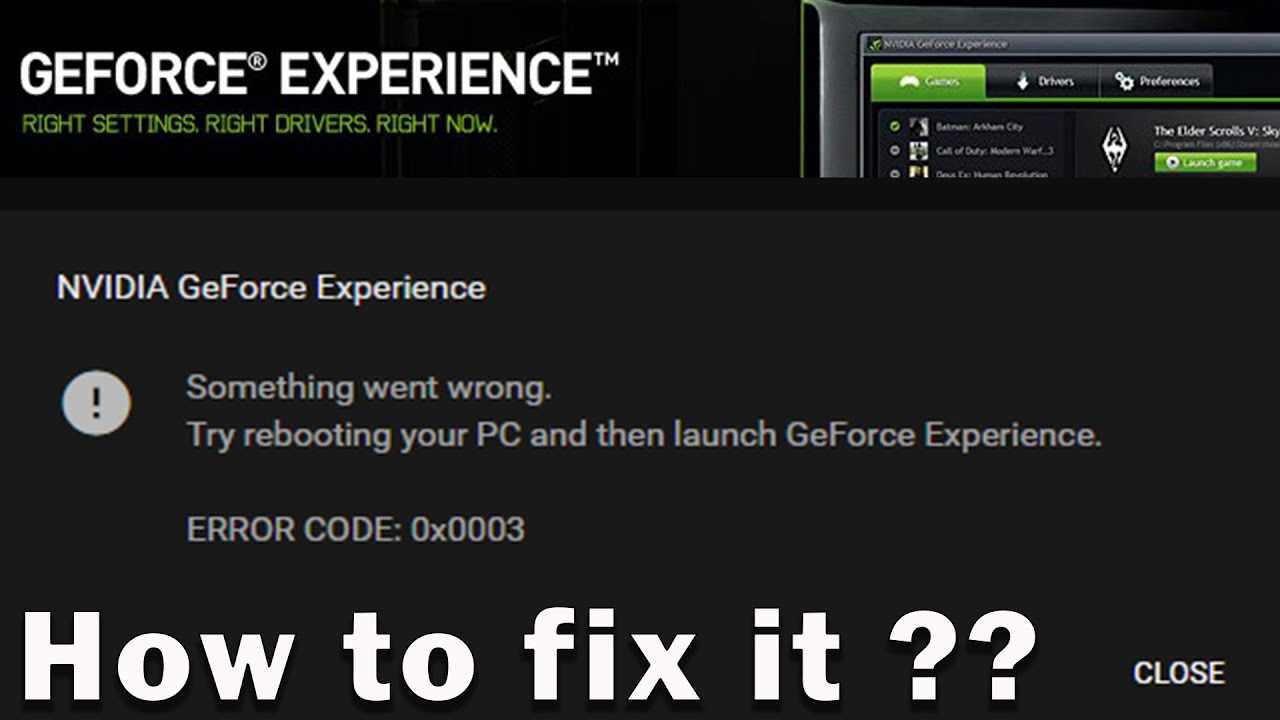
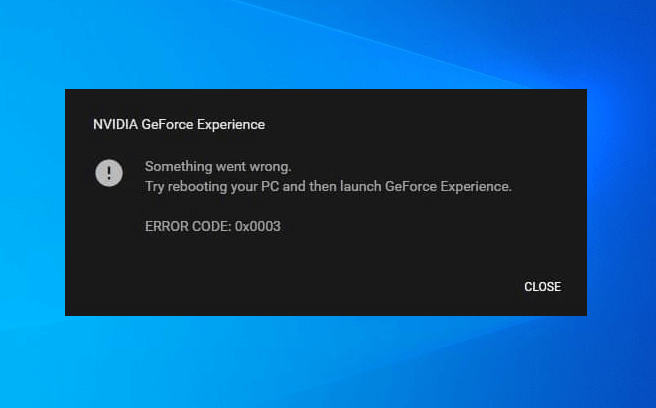
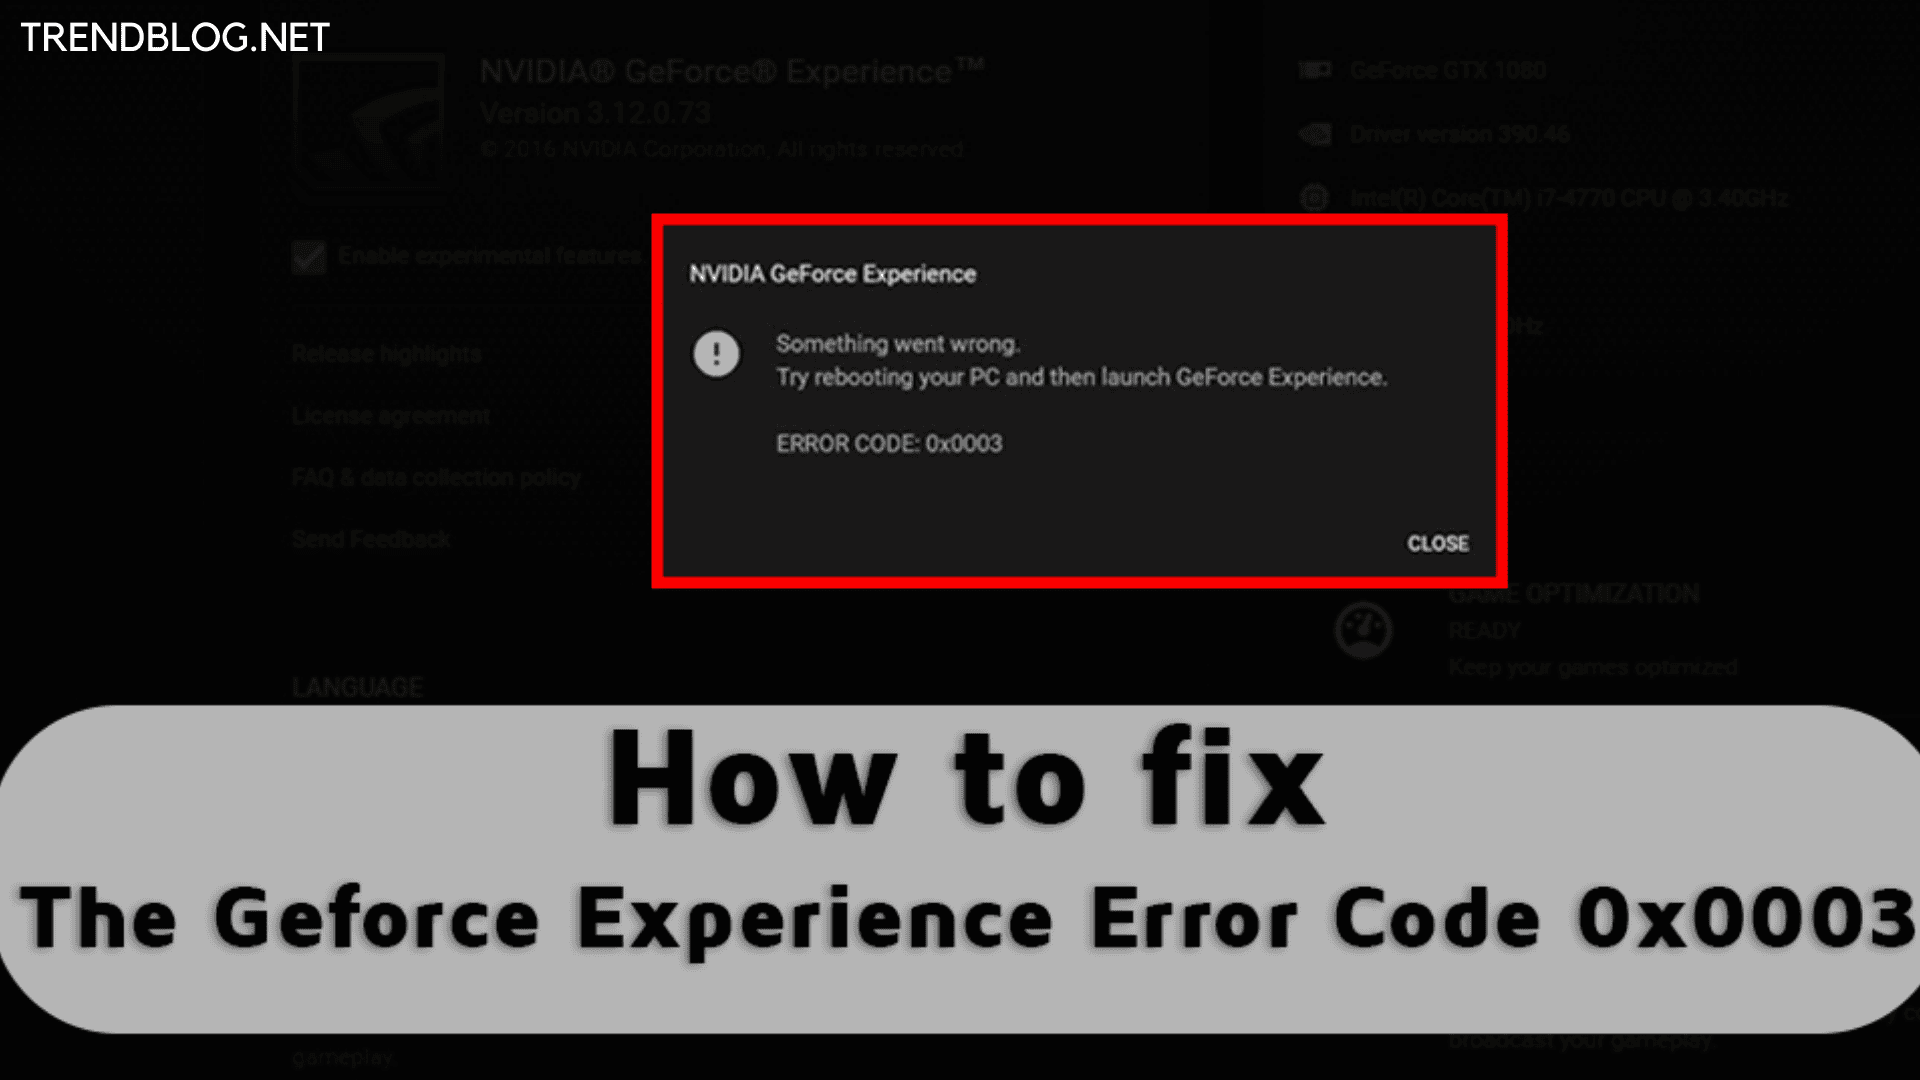
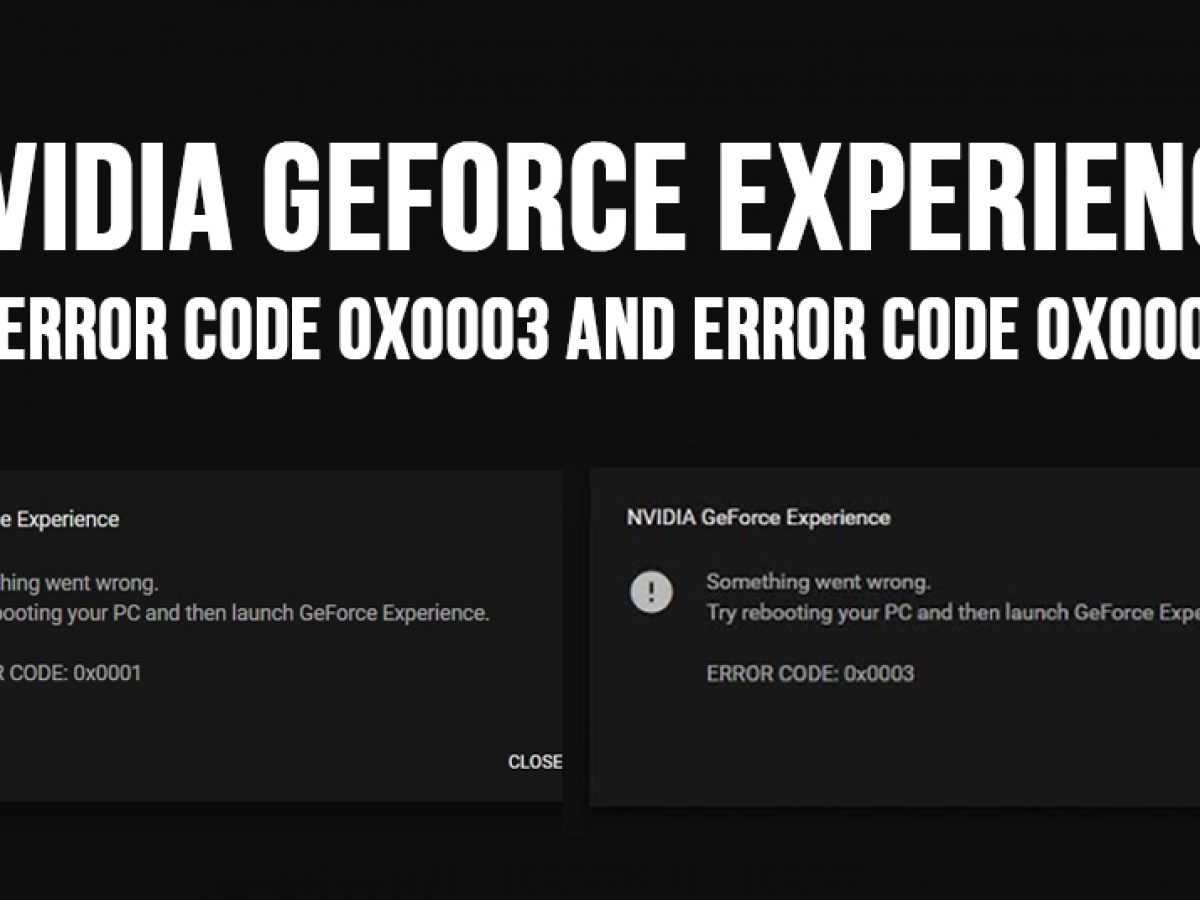
Как исправить код ошибки 0x0001 или 0x0003 NVIDIA GeForce Experience
Давайте рассмотрим некоторые исправления, чтобы избавиться от этой проблемы в Windows 10. Прежде чем начать, попробуйте перезагрузить компьютер, а затем запустите GeForce Experience и посмотрите, работает ли он. Также, если вы обычно создаететочку восстановления системы, то вы можете откатить систему назад в рабочее состояние.
1. Проверить службы Nvidia
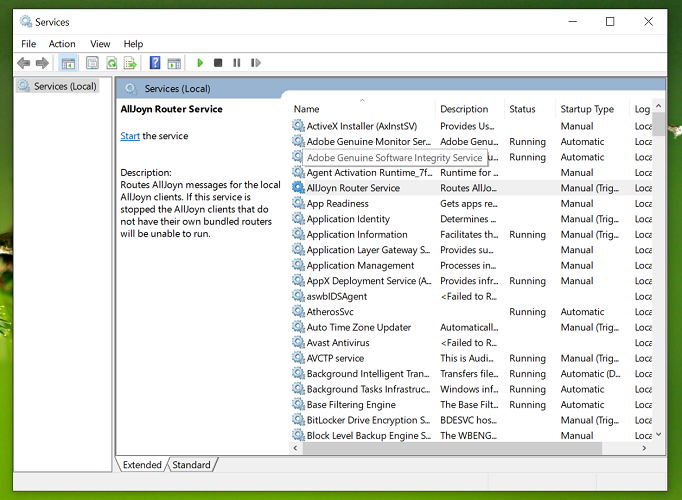
Нажмите комбинацию кнопок Win + R и введите в диалоговое окно services.msc, чтобы открыть службы
Теперь обратите внимание на следующие службы и убедитесь, что их типы запуска следующие:
- NVIDIA Display Container LS — Автоматически
- NVIDIA NetworkService Container — Ручной
- NVIDIA LocalSystem Container — Автоматический
- NVIDIA Telemetry Container — Автоматически
Дважды щелкните по службе, чтобы открыть окно свойств. Если служба еще не запущена, просто выберите «Запустить». А лучше нажмите на каждой «Остановить», а потом «Запустить», таким образом они перезапустятся.
Если выше не сработало, то хочу обратить внимание на службу NVIDIA Telemetry Container. Нажмите по ней два раза, чтобы открыть свойства
Далее перейдите во вкладку «Вход в систему», выберите пункт «С системной учетной записью» и поставьте галочку напротив «Разрешить взаимодействие с рабочим столом». Перезагрузите ПК.
2. Обновите драйвер видеокарты NVIDIA или перейдите на бета-версию
Одной из основных задач, которую вы должны сделать, является обновление драйверов видеокарты NVIDIA. Для этого вам просто нужно зайти на их сайт загрузки драйверов видеокарт и скачайте последнюю версию драйвера. Перезагрузите компьютер, чтобы изменения вступили в силу.
Если вы хотите попробовать бета-версию, вы можете найти ее здесь. Вы должны понимать, что бета-версия программного обеспечения содержит ошибки и нестабильна, вызывая ряд различных ошибок, но в то же время будет содержать некоторые исправления для некоторых ошибок в стабильном выпуске.
3. Полное удаление и чистая установка
Вы можете использовать программу для удаления драйвера видеокарты, которая полностью удаляет остаточные файлы в системе. После этого вы можете загрузить и установить последнюю версию графических драйверов NVIDIA. Обратитесь к руководству ниже, как:
Полностью удалить драйвера видеокарты Nvidia, AMD, Intel
Смотрите еще:
- Как обновить драйвер Nvidia не устанавливая GeForce Experience
- Видеодрайвер Nvidia перестал отвечать и был успешно восстановлен
- Драйверы NVIDIA, AMD, Realtek не устанавливаются в Windows 10
- Не удалось инициализировать драйвер этого устройства (Код 37)
- Как удалить старые ненужные драйвера в Windows
Способ 3: Сброс сетевой карты
Microsoft предусмотрела, что сетевой адаптер, ввиду продолжительной работы, может начать работать неправильно. Чтобы исправлять подобные проблемы, в Windows есть специальный инструмент для перезапуска компонента. Ничего сложного в процедуре нет, но потребуется доступ к консоли с полными правами.
- После нажатия Win + R в окно вставить cmd и нажать Ctrl + Shift + Enter (для запуска режима администратора).
- Получив все нужные привилегия и доступ к консоли, нужно вставить в неё команду netsh winsock reset и кликнуть по Enter.
- Как только команда завершит выполняться, следует перезагрузить ПК.
What is the GeForce Experience?
GeForce Experience is a program that helps you conveniently manage Nvidia graphics card drivers, offering various tools and special features for video game fans.
A proprietary program of Nvidia – one of the best-known chips and graphics hardware manufacturers – GeForce Experience is used for managing and updating Nvidia drivers. It also includes features for game recording and streaming.
You can use the software to install game-ready drivers that already contain configurations for specific games. An important feature is the automatic optimization of game graphics options
The tool is only available for 64-bit Windows 7 or earlier operating systems. However, the Windows 10-anniversary update is the most recommended by Nvidia. GeForce Experience is automatically supplied with newer driver versions. Otherwise, it can be downloaded free of charge from Nvidia.
Why is GeForce Experience not working for Twitch stream?
I think this problem has to do with a bug on Twitch’s end and/or a lack of verification at your end. Those who got the “Your broadcast to Twitch failed” with GeForce Experience report resolved the issue by simply enabling and setting two-factor authentication (2FA). And this is better done on a mobile phone.
Why GeForce Experience hotkeys won’t work?
While there have been a couple of theories, the real cause of this problem is still not known. Restarting the computer is a temporary fix but the issue returns in a couple of hours. However, a simple fix that works for most users is uninstalling GPU drivers and GeForce Experience. Then, reinstall them both.
GeForce Experience – How to fix Experimental not working
One of the working solutions is to uninstall GeForce Experience and reinstall it. If that doesn’t work for you, try downloading NVIDIA Experience without drivers. Uninstall Nvidia Experience and then re-install its Stand Alone version using the link here. Then you can enable Experimental features. All these take about two minutes.
How to fix GeForce Experience Highlights not working
First, you have to note that GeForce Experience Highlights work on select games, as seen in . Meanwhile, it only clips highlights for Fortnite and not for any other games like Apex Legends or Rocket League. So, the only fix is to ensure that GeForce Experience Highlights support the action you’re trying to make.
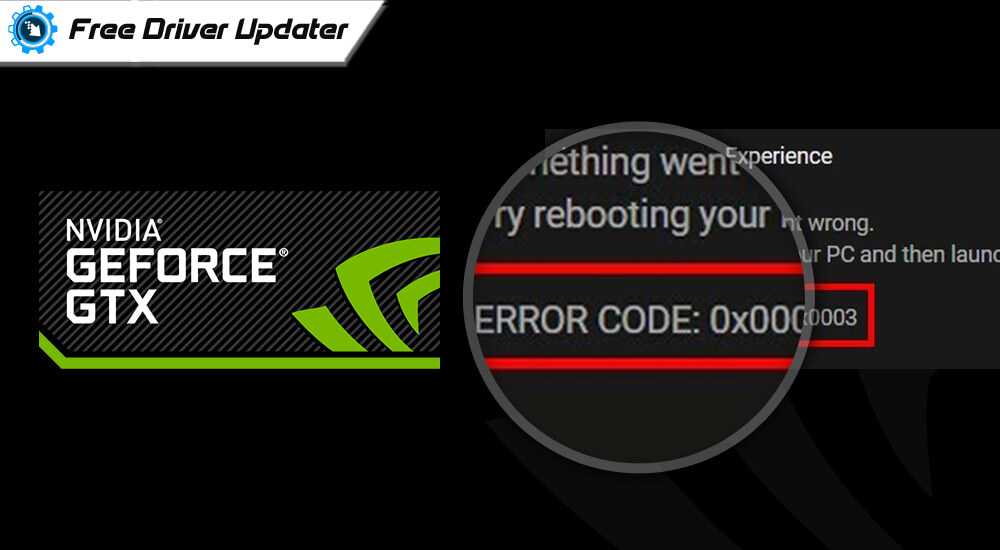
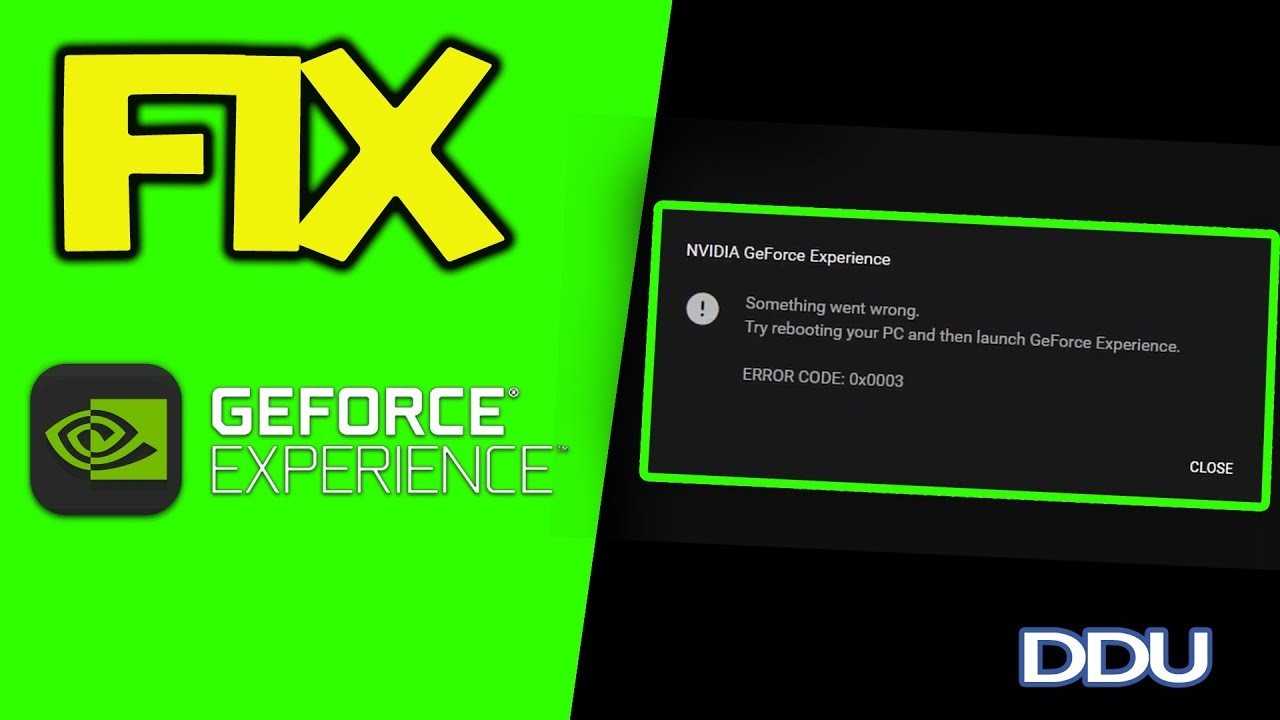
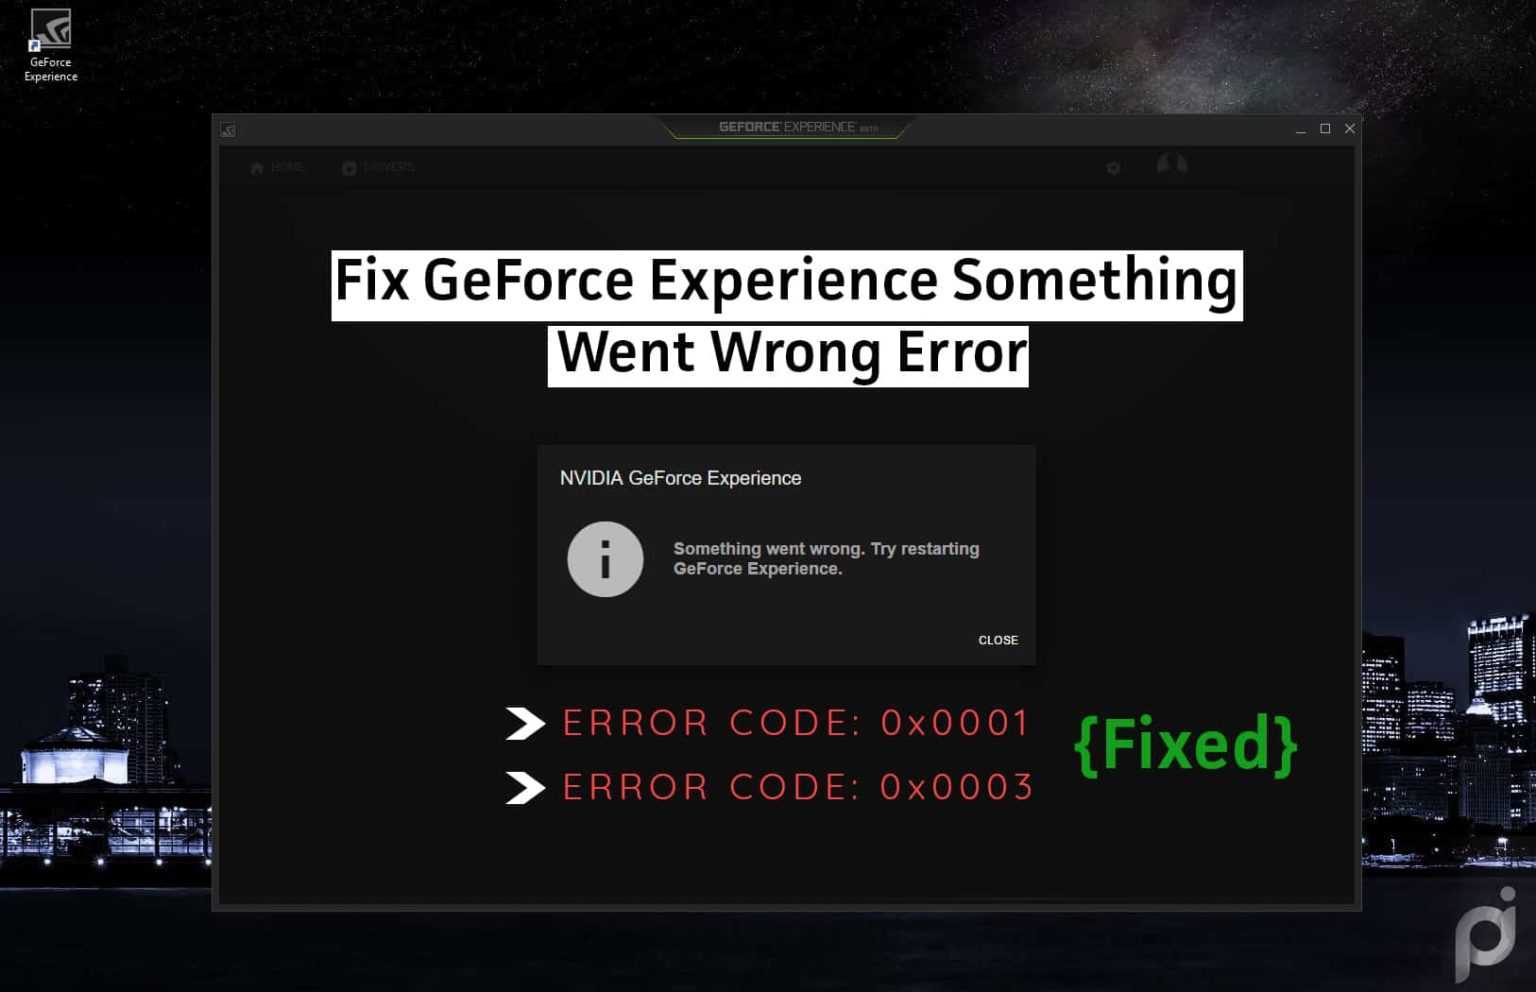
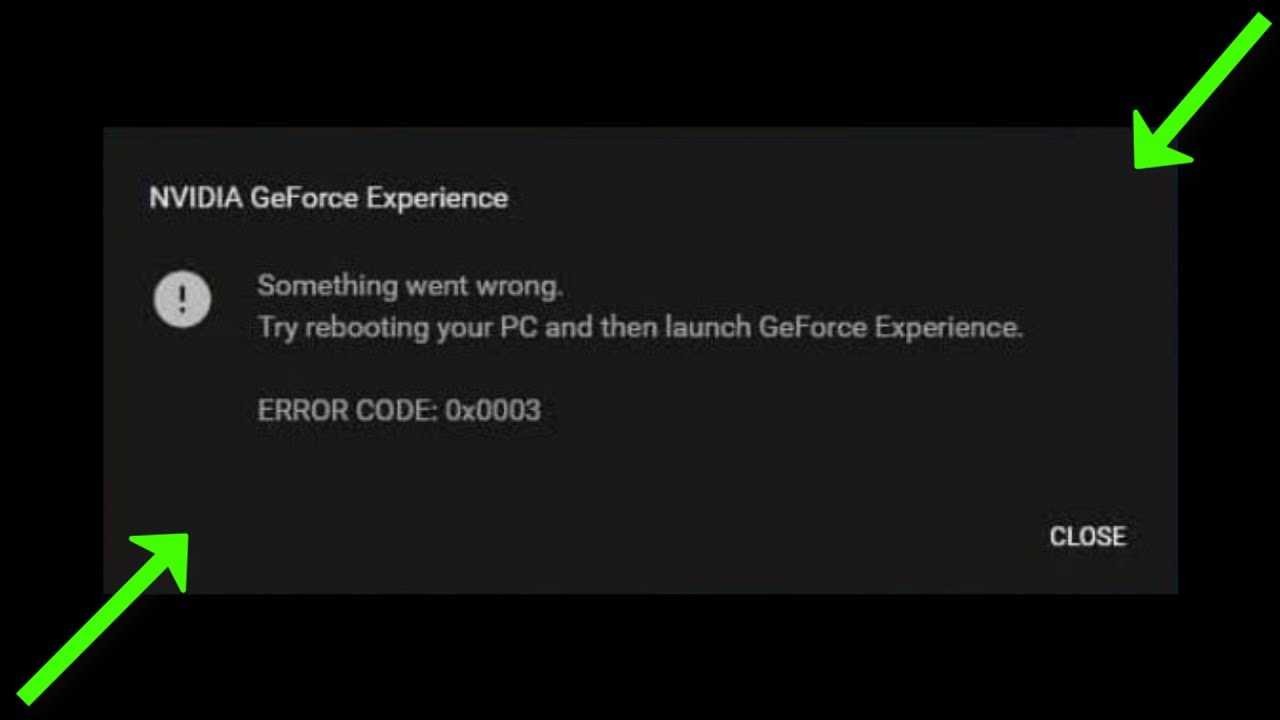
How do I fix the NVIDIA GeForce driver error code 0x0003?
1. Update Graphics drivers with Outbyte Driver Updater
The error try rebooting your pc and then launch GeForce Experience 0x0003 can occur due to corrupted drivers. Update Nvidia GPU with Outbyte Driver Updater to see if that resolves the error.
Outbyte Driver Updater is a premium Windows utility to update system drivers with one click. It features a massive database of over 18 million driver files. You can update individual drivers or all the drivers in batches after the scan.
Expert tip:
SPONSORED
Some PC issues are hard to tackle, especially when it comes to missing or corrupted system files and repositories of your Windows. Be sure to use a dedicated tool, such as Fortect, which will scan and replace your broken files with their fresh versions from its repository.
For backup and automatic updates, Outbyte Driver Updater comes with a backup manager and update scheduler. It will create a backup and save the existing drivers in case you need to restore the drivers.
![Nvidia geforce driver error code 0x0003 [fixed]](https://kubwheel.ru/wp-content/uploads/5/4/8/548f14eec0cdbd37590c4eae4ec1f136.png)

![5 tips to fix geforce experience error code 0x0003 windows 10 [minitool tips]](https://kubwheel.ru/wp-content/uploads/0/0/1/001bcf02a106b40e808edce7ae104975.jpeg)


![[fix] geforce experience error code 0x0003 | 100% working](https://kubwheel.ru/wp-content/uploads/4/4/8/4484505d9767e6f872b1b81e2d81807f.png)
Key features of Outbyte Driver Updater:
- One-click updates of graphics and other system drivers
- Lightning-fast scans
- Download manager
- Driver backup and schedule manager
2. Allow Nvidia Telemetry services to interact with desktop
- Press the Windows key + R to open Run.
- Type services.msc and click OK to open Services.
- In the Services window, scroll down and locate Nvidia Telemetry Container.
- Right-click on the service and select Properties.
- In the Properties window, open the Log On tab.
- Check Allow services to interact with desktop box.
- Click Apply and OK to save the changes.
- Go back to the Services window and locate the following services:
- Repeat the steps to enable the Allow service to interact with desktop option for all the services listed.
- Once all the services are enabled, try accessing NVIDIA GeForce Experience and check if the error is resolved.
Nvidia Telemetry services are required to run the software without any issues. Allowing the service to interact with desktop seems to have resolved the issue for many users. If the error persists, apply other fixes.
3. Reset the network adapter
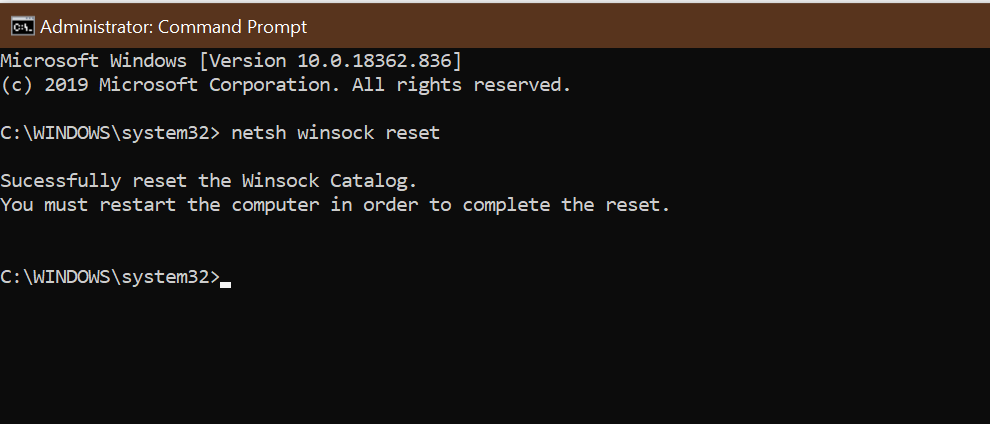
- Press the Windows key, and type cmd in the search.
- Right-click on Command Prompt and select Run as Administrator.
- In the Command Prompt window, type the following command to reset network adapter:netsh Winsock reset
- Wait for the command to complete.
- Once the command is processed, restart your computer and check for any improvements.
The GeForce error code 0x0003 can occur due to network issues. In that case, you can reset network adapter to fix network problems on your Windows 10 computer. If these steps didn’t fix the problem, try reinstalling the graphics driver manually.
4. Reinstall graphics drivers manually

- Press the Windows key + R to open Run.
- Type control and click OK to open the Control Panel.
- Go to Programs and click Programs and Features.
- Locate all the programs and installations associated with Nvidia.
- Right-click on one of the Nvidia GPU related app and click on Uninstall. Click Yes when prompted by UAC.
- Repeat the steps and uninstall the Nvidia related apps and GPU drivers.
- Once uninstalled, restart your computer.
- After the restart, go to the Nvidia download center.
- Select your graphics card model, series, and operation system version and language. Download the latest drivers available for your GPU.
- Run the installer and follow on-screen instructions to install the software and update the drivers.
- Make sure to restart your PC once the updates are installed.
Reinstalling Nvidia graphics drivers manually can fix many issues that may cause the GeForce Experience software to stop working.
If manually updating the driver, did not resolve the issue, try reinstalling Nvidia GeForce Experience and other software to see if that helps you resolve the Nvidia GeForce driver error code 0x0003.
The NVIDIA GeForce driver error code 0x0003 is usually triggered due to the Nvidia Telemetry services not running.
If starting the services did not help, try reinstalling the software. You may also try creating a new user account to fix the problem.
Still experiencing issues?
SPONSORED
If the above suggestions have not solved your problem, your computer may experience more severe Windows troubles. We suggest choosing an all-in-one solution like Fortect to fix problems efficiently. After installation, just click the View&Fix button and then press Start Repair.
Was this page helpful?
MyWOT
Trustpilot
Thank you!
Not enough details
Hard to understand
Other
x
Contact an Expert
There are 1 comments
Solution 5: Update the Nvidia Display drivers to Fix GeForce Experience error code 0x0003
If the above solution didn’t work out then you can update the display drivers through the official site of Nvidia to eradicate the Nvidia GeForce Experience error code 0x0003.
Here is how you can do it:
- Open the browser
- Now go to the official driver page Nvidia
- Now you can see two headings:
- AUTOMATIC DRIVER UPDATES
- MANUAL DRIVER SEARCH
- If you go for the automatic update, it will detect your Nvidia graphic driver and download and install the latest drivers.
- It is recommended to go for the manual driver search
- Fill the all required requirement
- In Product Type select the type you using like Nvidia offer GeForce, Titan, Legacy, 3D Vision, ION
- Now select the Product series, in case you don’t know the product series you can know it by upcoming easy steps
- Click on the Search icon
- Type device manager
- Click to open device manager
- Then select the Display adapters
- A further menu will open
- Now you can see the Name of the graphic driver series you are using.
- After Selecting the Product Series
- Now click on the Product you use
- Now select Operating System Type which Windows you using and any other operating system
- Next, select the Language carefully if you download the wrong language the whole setting will be in another language
- Select the Download type
- Now you can clearly see there are two options
- One Is “Game Ready Drivers“
- The second is “Studio Drivers“
- Game-ready drivers are for to provide the best gaming experience and it’s specifically made for a graphics-intensive game
- Studio Drivers are for those who use creative tools to create new content.
- So, Choose according to your preference
- Now click on the “START SEARCH” Button
- Now you have the results click on the latest pack
- Download it and install it
- Read this guide for detailed information about How to Update Graphics Card Driver on Windows 11?
Solution 4: Update Graphics Card Driver Thorough Device manager
Outdated graphic drivers can be updated in multiple ways. If you are unable to update your graphic drivers by updating Windows, you can try updating through the Device Manager too.
Here is how you can do it:
- Click on the Search icon
- Type Device Manager
- Click to open Device Manager
- Then select the Display adapters
- A further menu will open
- Right-click on the graphic card name
- Click on the Update driver
Rolling Back the Driver:
If you experiencing the Nvidia GeForce Experience error code 0x0003 issue after updating your graphic driver you can roll back the driver’s recent update to avoid the error code 0x0003.
Here is how you can do it:
- Click on the Search icon
- Type Device Manager
- Click to open Device Manager
- Then select the Display adapters
- A further menu will open
- Right-click on the graphic card name
- Click on the Properties
- A graphic card properties Window will open
- Navigate to the driver Tab
- There is an option of “Roll Back Drivers” click on it
- If the option of “Roll Back Drivers” is grey out this means that the driver did not update recently.
How to update Nvidia drivers
If you would like to update the Nvidia graphics card driver on your PC, this can be done automatically via Windows or manually. I’ll show you exactly how to do it:
Manually update Nvidia drivers
- Open the following Nvidia web page to go to the graphics card drivers.
- Enter the requested information and click “Search” if you know which graphics card is installed.
- Download the current driver by using the “Download” button.
If you have no idea about your graphics card, select the gray “Graphics driver” button. Then, if you click on the “Install plug-in” button above, Nvidia will analyze your Nvidia version via Java. You will then be offered the appropriate download.
Update Nvidia graphics card driver via Windows
- Simultaneously press the Windows and R keys to open the “Run” command
- Enter devmgmt.msc here and confirm with “OK”. The device manager then starts.
- You will now find your Nvidia graphics card under the “Graphics card” category. Select this with the mouse.
- Right-click on the entry and select the Update driver software option.
- Windows uses the Automatically search for the latest driver software function to start the search. If an update is found, it will be installed.
Solution 2: Keep your PC Updated To fix Nvidia GeForce Experience error code 0x0003 Windows 11
Sometimes your outdated PC is the main cause of the Outdated Graphics Card Driver on Windows 11
Outdated drivers in your PC or your current Windows Version are not able to support the gaming software plus it starts giving errors like Nvidia GeForce Experience Error Code 0x0003 as you update your Windows all associate running drivers are updated too.
So, here is how you can do it:
- Click on the Windows icon
- Click on the Settings icon
- A new window will pop up
- Select Windows Update from the left menu
- The new window will pop up
- Then click on Check for updates
- If there is any update it will start updating the PC.
You can also update your graphic drivers through Windows Update.
Solution 8: Reset Network Adapter
GeForce experience is a network-intensive app.
If the application is unable to receive a strong signal, then it might cause the GeForce Experience Error Code 0x0003.
To avoid this error, we have to reset the network adapter.
Here is how you Reset the network adapter to fix GeForce Experience Error Code 0x0003.
- Go to the Search Icon
- Click on it
- Type “cmd“
- The command prompt will come
- Select Run as administrator
- The Command prompt will open
- Now type “netsh winsock reset”
- Now press “Enter“
- When the program is done
- Restart the PC
Now hopefully, the error GeForce Experience Error Code 0x0003 is rectified.
Solution 5: Install Graphics Drivers:
If none of the above methods fixes the error, then it may be possible that the GPU drivers have become corrupted, and they are causing this error. In this case, manually reinstalling the drives would work;
- Press the keys “Windows” and “R” simultaneously to open the “RUN” window.
- Now type “appwiz.cpl” and press the Enter key.
- “Program and Features” window will open on pressing the Enter key.
- Identify the GPU drivers, Uninstall them one by one by right-clicking and selecting the “Uninstall” option from the menu.
- After removing all the programs from NVIDIA corporation, restart your computer.
- Now, reinstall the drivers from this link. https://www.nvidia.com/Download/index.aspx?lang=en-us
- Here you need to enter your GPU model, series, operating system version and language.
- Clicking on the search button will find the latest driver compatible with your GPU.
- Click on the download button and download the setup.
- Now follow the installation wizard and get the latest drivers.
- Restart your computer and check if the problem persists.
Reason Behind Error Code 0x0003 Nvidia Geforce Experience
Several users have reported NVIDIA Experience Error Code 0x0003. Experts have identified several factors. Here are some of the possible causes, depending on the error message:


The desktop does not interface with Nvidia Telemetry.
This error can occur when the Nvidia Telemetry Container is not set up to interface with the desktop.
Corrupted Nvidia driver.
Errors will occur if you utilize outdated or corrupted drivers. In this particular, the GeForce Experience error code is 0x0003. You may need to delete and reinstall all NVIDIA Component drivers.
Your GPU driver is affected by a Windows upgrade.
It is critical to keep your Windows up to date for your computer to work at its best all of the time. Unfortunately, some customers have reported receiving this problem after updating their computers.
You’re having problems with your network adaptor.
When your Network adapter isn’t working correctly, this error message can be problematic. According to user complaints, this error message might also appear if the network adapter is in a limbo condition. When this happens, you may simply conduct a Winsock reset to fix the problem.
Nvidia Services isn’t running in its entirety.
There are a few NVIDIA services that you should check to see if they’re working correctly. NVIDIA Display Service, NVIDIA Local Container, and other services must all be reviewed.
The primary objective for installing Geforce Experience on your computer is to boost its performance. You attempted to open your NVIDIA GeForce Experience but were unable to do so. A GeForce Experience error code of 0x0003 is displayed.
Исправление ошибки «Что-то пошло не так, попробуйте перезапустить GeForce Experience»
Программа Geforce Experience используется многими пользователями ПК в качестве приложения для управления и настройки работы видеокарты NVIDIA. Она автоматизирирует обновление драйверов, оптимизацию режима для игр, позволяет осуществлять запись игр, управлять цветопередачей. Иногда, при запуске программы, сразу после её инсталляции или в процессе использования, может появится ошибка «Что-то пошло не так, попробуйте перезапустить GeForce Experience», что говорит о невозможности дальнейшего использования этой программы. В этой статье расскажем о причинах появления ошибки и рассмотрим эффективные варианты устранения.
4. Update Your Nvidia GPU’s Drivers
Outdated GPU drivers can cause all kinds of problems. If you have a habit of leaving your drivers un-updated, try updating your Nvidia GPU drivers to the latest version and see if that fixes the error message.
To update your GPU driver, do as follows:
- Press Win + R to launch the Run command box. Type devmgmt.msc and hit the enter key to launch device manager.
- Scroll down and find the Display Adapters option. Click on the arrow icon to expand the section.
- Now, right-click on the name of your Nvidia GPU. Oftentimes, there will be two GPUs — discrete and integrated.
- Select the Update Driver option from the context menu. Then click on the Search automatically for drivers option.
- Let it find and install the latest drivers on your system.
- Perform a system restart. Launch GeForce Experience to check if it counters the same error.
Причины ошибки Geforce Experience 0x0003
Проводить исследование сбоя пришлось долго, но результат был. За время тестирования и изучения дампов памяти удалось выявить несколько потенциальных проблем, способных вызывать данную неполадку.
- Телеметрия Nvidia не может взаимодействовать с рабочим столом. Данная проблема нередко возникает из-за столько неочевидной настройки. Если подобный сценарий применим к конкретной системе, исправить проблему поможет повышение уровня прав для службы.
- Часть обязательных служб для работы NVidia не отвечают или отключены. Чтобы драйвера работали исправно, важны 3 службы: Nvidia Display Service, Nvidia Local System Container and Nvidia Network Service Container. Отключение любой из них может вызвать подобную неполадку. Чтобы восстановить нормальную работу, достаточно принудительно запустить все перечисленные службы.
- Повреждение драйвера Nvidia. Неполадка одного или нескольких драйверов графического процессора могут вызывать разные ошибки, в том числе 0x. Лучший путь для исправления – переустановить все необходимые компоненты NVidia.
- Сбой сетевого адаптера. Эту причину удалось установить из нескольких отчётов пользователей. Зависание сетевого адаптера провоцирует появление ошибки. Обычно проблема носит временный характер и устраняется переустановкой связи (сбросом Winsock).
- Центр обновления Windows повредил драйвер. По результатам исследования отчётов пользователей известно, что проблема начала появляться после автоматического обновления драйверов. В целях исправления ошибки целесообразно удалить текущий драйвер и установить новую версию заново. Альтернативный способ – откат.
Не устанавливается драйвер NVIDIA на Windows 7
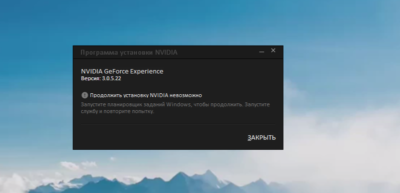
Многие пользователи при установке драйверов на видеокарту часто сталкиваются со множеством проблем. Одна из них — невозможность установить драйвер. Данная проблема довольно распространенная, но также и быстро решаемая.
Сегодня мы детально разберемся, как же всё-таки решить проблему с невозможностью установки драйвера для видеокарты NVIDIA на Windows 7.
Проявление проблемы
Если вы увидели такое вот окошко, которое предупреждает, что установку драйвера NVIDIA продолжить невозможно, то соответственно этот материал вам поможет. Итак приступим.
Как узнать ID видеокарты
Прежде всего, вам необходимо узнать идентификатор вашей видеокарты. Для этого мы правой кнопкой мыши кликаем на «Мой компьютер» и выбираем пункт «Свойства». Далее заходим во вкладку «Диспетчер устройств» (вкладка в верхнем левом углу), выбираем «адаптеры» и смотрим, какой видеоадаптер у нас здесь стоит. В нашем случае это NVIDIA GeForce GT 630, а в вашем может быть как «Стандартный видеоадаптер», так и любая другая дискретная видеокарта
Это не столь важно. Два раза кликаем на свой адаптер, в открывшемся окне заходим во вкладку «Сведения», ниже – «Свойство». Во вкладке «Описание устройства» выбираем пункт «ID оборудования» и кликаем на него
Во вкладке «Описание устройства» выбираем пункт «ID оборудования» и кликаем на него
Два раза кликаем на свой адаптер, в открывшемся окне заходим во вкладку «Сведения», ниже – «Свойство». Во вкладке «Описание устройства» выбираем пункт «ID оборудования» и кликаем на него
В открывшемся списке нас интересует вторая строка. Это и есть идентификатор вашей видеокарты. Кликаем правой кнопкой мыши на эту строчку и выбираем пункт «Копировать». Таким образом мы скопировали в буфер обмена ID вашей видеокарты.
Распаковка драйвера
Следующее действие, которое нужно произвести — посмотреть куда мы распаковали драйвер NVIDIA который уже на этот момент должны были скачать. Запускаем его и смотрим — директория по умолчанию: диск C, папка NVIDIA Display Driver и так далее. Находим эту папку на диске «C», попадаем в основную директорию драйвера, но нам необходимо зайти в папку «Display Driver». Здесь нам нужен файл nvamn с расширением inf.
В данном случае расширение видно, но бывает расширение не отображается — в зависимости от настроек «Файлов и папок»
Но это не столь важно на самом деле
Правка файла nvamn
- Открываем файл любым текстовым редактором. По умолчанию он открывается Блокнотом, и этого нам вполне достаточно. Затем скролим колесиком мышки вниз до строчки .
- Ставим курсор на окончание этой строчки и жмём «Enter» для того, чтобы у нас под строчкой появилось свободное место, и вставляем туда то, что мы скопировали в буфер обмена.
- В нашем случае это строка идентификатора видеокарты. Это только вторая половинка нужной нам строки, и теперь нам эту строку надо привести к полноценному виду.
Нам нужно скопировать вот эту часть,
и вставить перед нашей половиной текста. Итак, вставляем. Здесь нам необходимо еще поставить пробел, смотрим, что получилось. Это должно выглядеть так.
-
- То есть, мы создали в данном файле новую строку и выглядит она теперь практически точно так же, как и нижние за исключением того, что здесь идентификатор видеокарты немного другой которого не было изначально в этом файле. Теперь копируем полностью эту строку в буфер обмена, и еще немного скролим колесиком вниз. Доходим до строчки ,
и точно так же под ней вставляем новую строку из буфера обмена, которую мы создали. Далее скролим ещё ниже, до строчки ,
и здесь под этой строкой также повторяем процедуру – вставляем из буфера обмена нашу строчку.

![[fix] geforce experience error code 0x0003 | 100% working](https://kubwheel.ru/wp-content/uploads/3/0/5/30502ba861acd63feec053879c364a3e.jpeg)


![Nvidia geforce driver error code 0x0003 [fixed]](https://kubwheel.ru/wp-content/uploads/0/6/8/068fbc5bbfcf68ffd9345b232e999e86.jpeg)
Подводим итоги
- Всё. Закрываем файл. Естественно, не забываем «Сохранить» его. Теперь заходим снова на диск «C», папка NVIDIA и так далее туда, где находится распакованный драйвер, и нажимаем setup.exe.
- После небольшой паузы будет произведена проверка ID оборудования на совместимость с данной версией драйвера.
То есть, по сути это то, что было изначально, только с той лишь разницей, что теперь в драйвере есть информация о видеокарте, которая установлена в системе, и соответственно видеокарта теперь должна пройти проверку, а система позволит драйверу установиться.
- Так и есть. Как мы видим, появилась зеленая кнопка — «Принимаю.
Продолжить», которая дает возможность перейти к дальнейшей установке драйвера NVIDIA. Проблема с невозможностью установки драйвера решена.
Как было сказано в начале статьи, проблем с установкой драйверов на видеокарту бывает великое множество, но самую распространенную, связанную с невозможностью идентификации видеокарты, мы рассмотрели и решили в данном руководстве. Решение оказалось довольно простым, но весьма эффективным.
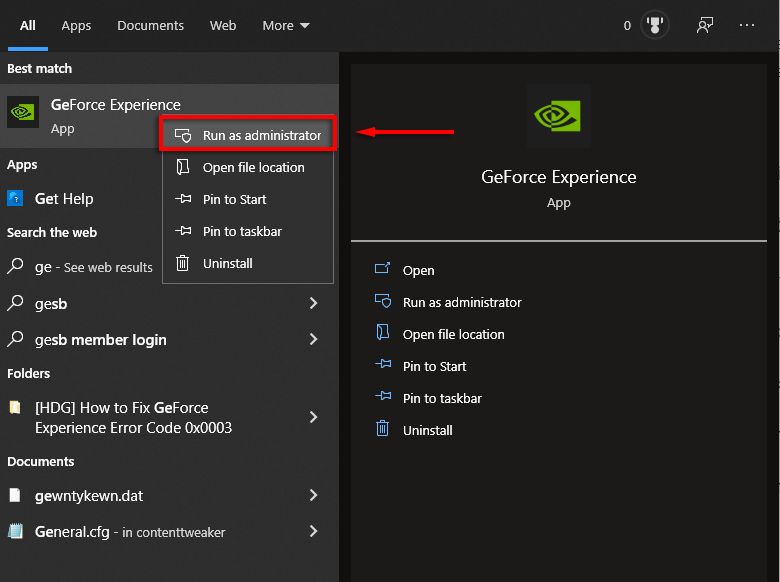
Fix 4: End And Force-Restart All NVIDIA Services

When a program crashes, restarting it often solves the issue. Bugs happen once in a while, but that isn’t necessarily a sign of a permanent problem.
To force all NVIDIA services to restart using Task Manager, follow the steps below:
- Right-click on your taskbar (don’t right-click a shortcut for an app, as that will bring up a different menu) and choose Task Manager.
- Open the Processes tab and see if there are any NVIDIA GeForce Experience-related processes active in the background. If you find one, end it by right-clicking it and selecting End Task.
To restart those services, press Windows + R on your keyboard. In the box, type in msc and press Enter on your keyboard.
You can then locate all NVIDIA services and use the Restart function on them. If some services have not started, you can right-click them and choose Start.
This should restore functionality to your GeForce Experience, but it might not work for everyone, especially if the problem is related to something else, such as corrupt driver files.
1. Restart Nvidia Services
You may encounter the error code if one or more essential Nvidia services become unresponsive. If this happens, you’ll need to manually restart the services to get things fixed again.
To restart the Nvidia services, perform the following tweaks:
- Press Win + R to launch the Run command box. Type services.msc in the text input area and hit Enter.
- The Windows User Account Control (UAC) will pop up. Click on OK to launch the Services window.
- Now, scroll down and find all the services with the word «Nvidia» in them.
- Right-click on any one service and then select Restart from the context menu.
- Repeat this process with all the Nvidia services including Nvidia Display Service, Nvidia Local System Container, and Nvidia Network Service Container.
- Now, re-launch the GeForce experience app to check if the error persists.
Решение ошибки 0x0001 в GeForce Experience
Обычно ошибка с данным кодом появляется на ПК в том случае, если у пользователя не достаточно прав для использования данной программы. Иначе говоря, файлы программы находятся в системной директории, к которой, например, пользователям из группы «Гости» доступ закрыт. Конечно же, если вы единственный пользователь компьютера, то эта причина отпадает.
Ошибка 0x0001 в GeForce Experience
В целом код означает конфликт параметров доступа из вашей учётной записи к файлам программы. Простым способом избавиться от этого будет — переустановка компонента GeForce Experience. Но перед этой процедурой удалите файлы предыдущей программы. И почистите реестр во избежание проблем при следующей установке.