
Что делать, если не удалось загрузить носитель?
- Перейти в Opera
- Обновите свой веб-браузер
- Отключите Adblock в вашем браузере
1. Перейдите в Opera
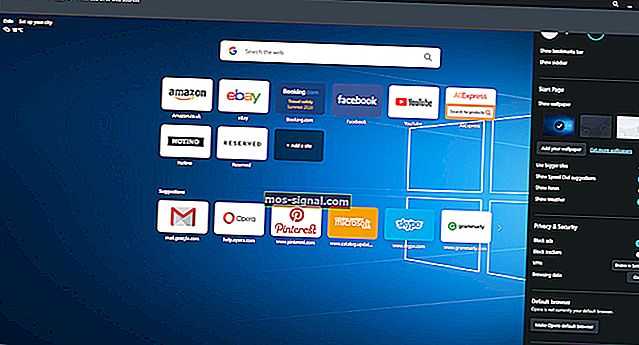
Если вы не знаете, какой браузер загрузить на свой компьютер, мы рекомендуем Opera . Это решение для просмотра основано на архитектуре Chromium. Он имеет встроенную поддержку webM — современного, высококачественного и открытого формата видео. Он также имеет встроенную поддержку видеокодека Ogg Theora.
Есть еще один формат — кодек H.264, который поддерживается только некоторыми браузерами. Для всех веб-разработчиков это означает, что вы должны предлагать одно и то же видео в двух разных форматах. Это обеспечит 100% совместимость.
У вас не возникнет проблем с буферизацией видео, поскольку этот браузер автоматически блокирует трекеры, рекламу и другие элементы, которые могут вызвать проблемы с медленным просмотром.
В качестве бонуса у него также есть всплывающее окно с видео: плавающее видеоокно, которое можно настраивать.
Он также имеет множество полезных функций для повышения вашей производительности, таких как:
- Интеграция боковой панели с Messenger, Instagram, WhatsApp
- Рабочие области — для группировки вкладок и большей организованности
- Искать во вкладках — как недавно закрытых, так и открытых
- бесплатный VPN
2. Обновите свой веб-браузер.
- Откройте браузер Chrome на вашем ПК.
- В окне меню (домашняя страница) перейдите в верхний правый угол и найдите Параметры (показано 3 точками).
- Щелкните значок меню, а затем щелкните Параметры .
- В левой части страницы настроек щелкните значок гамбургера.
- Выберите в меню О Google Chrome .
- Отсюда браузер автоматически проверит наличие доступных обновлений и установит их напрямую.
Чаще всего, когда вы получаете сообщение «Носитель не может быть загружен, либо из-за сбоя сервера или сети, либо из-за того, что формат не поддерживается» , фактическая причина может заключаться в том, что вы используете устаревший браузер.
В этом случае окончательным решением будет обновление вашего веб-браузера до последней версии, после чего вы сможете загрузить и просмотреть затронутые медиафайлы / видео.
Как только это будет сделано, вернитесь и попробуйте снова загрузить затронутое видео. Если вы можете загрузить / воспроизвести его, то все готово; в противном случае вы можете попробовать следующее исправление.
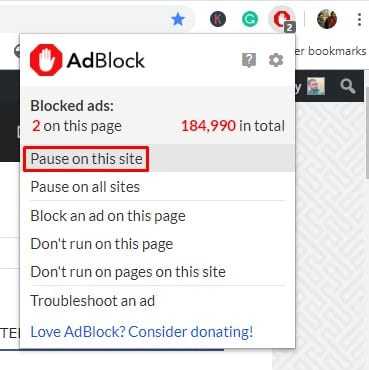
3. Отключите Adblock в вашем браузере.

- Откройте Chrome и перейдите на сайт, на котором отображается это сообщение об ошибке.
- Щелкните значок Параметры.
- Найдите и щелкните значок ABP (AdBlock) .
- Отключите AdBlock, нажав на значок блокировки рекламы .
- Обновите страницу.
Проверьте, может ли видео теперь загружаться. Если ошибка не устранена, проблема, вероятно, связана с сетью (а не с вашей стороны), и в этом случае вы мало или ничего не можете с этим поделать, кроме как продолжать попытки.
Однако, если вы используете веб-сервер, который не поддерживает определенные форматы видео (например, MP4, OGG, WebM и т. Д.), Вам, возможно, придется перенастроить сервер, чтобы предложить поддержку этих видеоформатов.
Иногда некоторые сайты используют эту ошибку как дымовую завесу, чтобы обманом заставить вас отключить любую функцию блокировки рекламы в вашем браузере. В большинстве случаев видео, которое вы пытаетесь посмотреть, содержит рекламу, и ваш браузер (с блокировщиком рекламы) не сможет воспроизвести это видео. Это приведет к тому, что носитель не может быть загружен либо из-за сбоя сервера или сети, либо из-за того, что формат не поддерживается .
В зависимости от браузера существуют различные способы включения / отключения AdBlock. И для удобства мы покажем вам, как отключить его в Google Chrome.
Вы можете просто отключить AdBlock на сайте хоста затронутого видео, чтобы получить доступ к видео.
Сообщение об ошибке Носитель не может быть загружен либо из-за сбоя сервера или сети, либо из-за того, что формат не поддерживается , обычно связано с неподдерживаемым форматом, и в большинстве случаев вы сможете решить эту проблему с помощью одного из наших решений. .
Примечание редактора: этот пост был первоначально опубликован в мае 2019 года и с тех пор был переработан и обновлен в июле 2020 года для обеспечения свежести, точности и полноты.
Best Ways to Fix ‘The Media Could Not be Loaded’ Error In Google Chrome
So, in this article, we have shared some of the best methods to help you fix the ‘The media could not be loaded’ error message from the web browser.
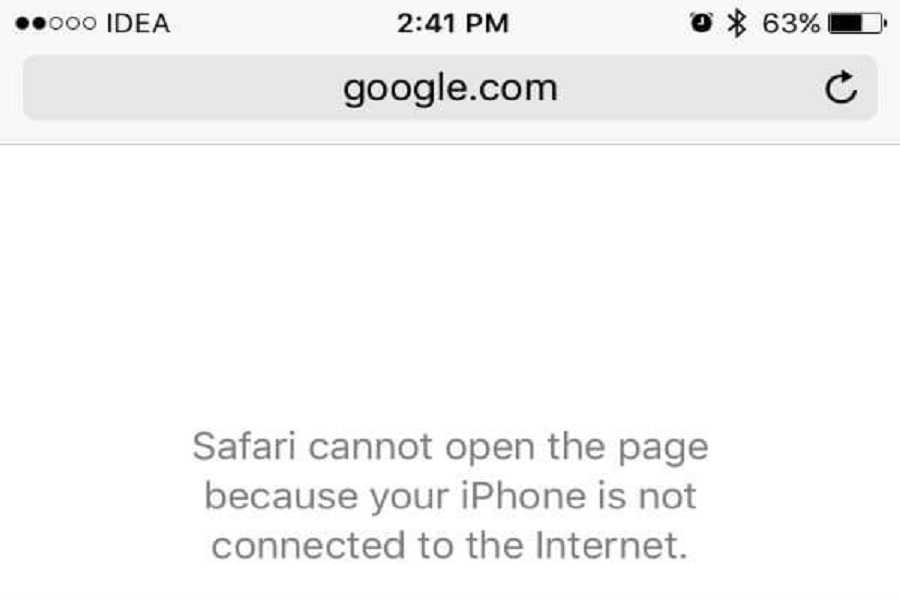
1. Check for Internet Issues

Internet is often the main reason behind the ‘The Media Could Not be loaded’ Chrome error. This happens when the browser fails to load the video due to internet issues.
Hence, it’s recommended to check for internet issues before trying any advanced methods. To check if your internet is working, you can use speed test websites.
2. Update Your Web Browser

An outdated web browser invites lots of bugs and errors. Many Windows users have resolved the ‘The media could not be loaded’ error message by updating the web browser.
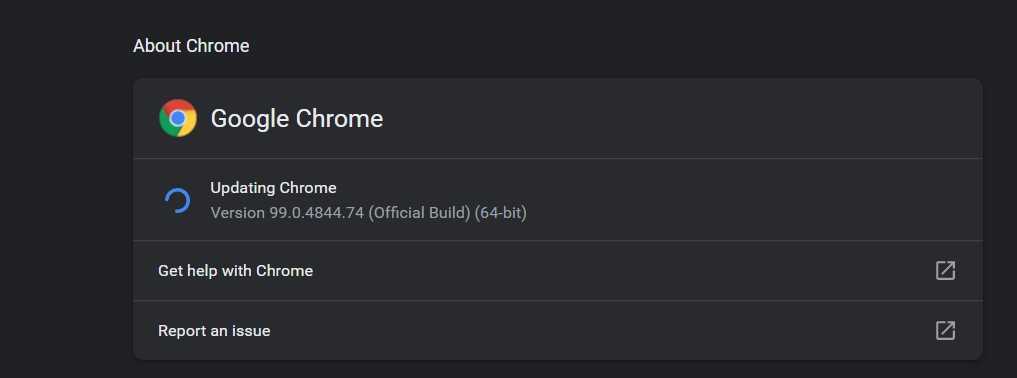
Updating the web browser can fix almost all browser-related problems and provide a better browsing experience. So, head to Settings > Help > About Google Chrome. Now, wait until Google Chrome checks for the browser updates.
3. Disable Adblocker from the webpage
Well, video players and hosts worldwide are now using this technique to get visitors to disable Adblocking software or extension.
Webmasters display the ‘The media could not be loaded’ error message when it detects the adblocker extension or software.
So, if that was the case, the problem could be resolved by disabling the Adblocking software or extension. To disable Adblock on a specific website, follow some simple steps below.
- Open the webpage where you are getting the error message.
- Click on the adblocker extension.
- Click on ‘Don’t run on this page’
That’s it; you are done! This is how you can disable AdBlock for the webpage to fix the ‘The media could not be loaded because the format is not supported’ error message.
4. Enable or Disable VPN
Yes, VPNs are great privacy and security tool to make you anonymous and remove your footprints on the web, but they can sometimes create problems with media playback.
If you cannot play the video while connected to a VPN, you need to disable it. The opposite of it can also be true. If you are unable to play the video with your regular IP Address, try connecting to a VPN.
Enabling or disabling will possibly resolve the Media Could Not be loaded error on the Chrome browser.
5. Clear the Cache & Cookies

Outdated cache and cookies often trigger many error messages, including ‘The media could not be loaded because the format is not supported’. So, you could try clearing the cache and cookies to fix the ‘The media could not be loaded because the format is not supported’.
Many users on the Microsoft forum have claimed that the ‘The media could not be loaded because the format is not supported’ error message has been resolved by clearing the old cache and cookies from the web browser.
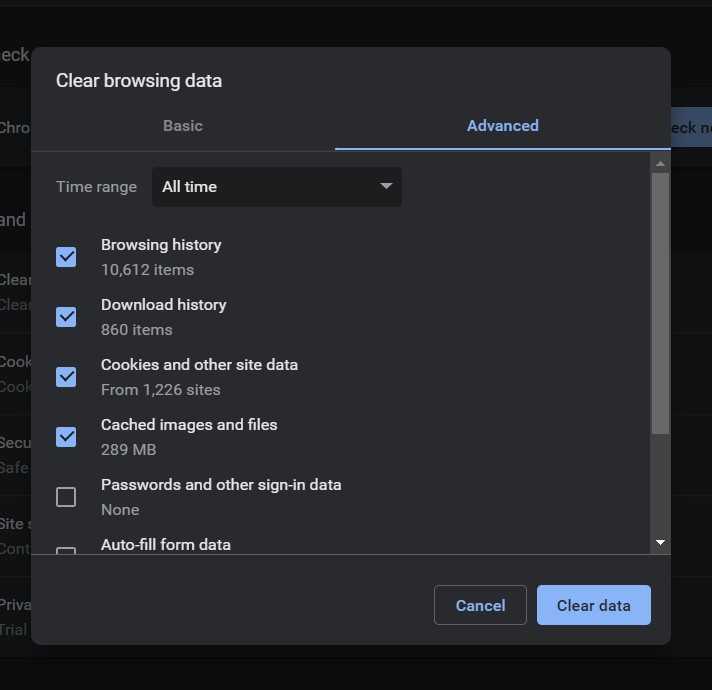
So, head to Settings > Advanced Options. Now on the Advanced options, click ‘Clear Browsing Data’. Select the cache and cookies from the list, then click ‘Clear browsing data’. Once done, restart your browser to fix the ‘The media could not be loaded because the format is not supported’ error message.
6. Reset Your Chrome Browser
Resetting should be your last resort if everything else fails to fix ‘The Media Could Not be Loaded’ error message. To reset your Chrome browser, follow these steps.
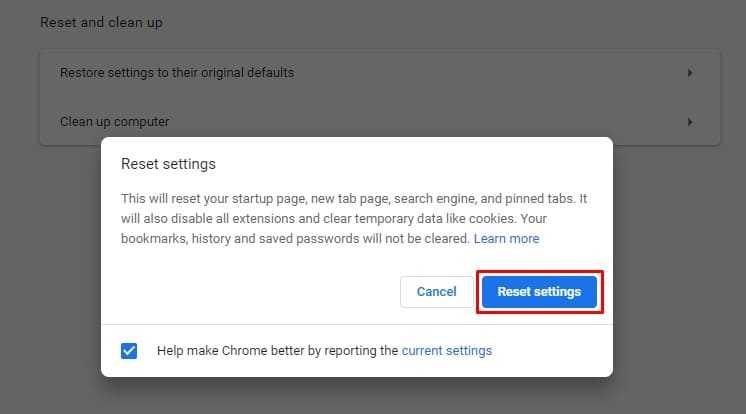
Head to Settings > Advanced Options. On the Advanced Options, scroll down and click the ‘Restore Settings to their original defaults’ option. On the prompt that appears, select ‘Reset Settings’.
7. Try Different Browser
If the problem appears even after clearing the cache and cookies, you need to try a different browser. The ‘The media could not be loaded because the format is not supported’ is said to affect all internet browsers, but most of the time, it affects only one specific web browser for one victim of this issue.
![[fixed] the media could not be loaded error in chrome](https://kubwheel.ru/wp-content/uploads/8/9/c/89c96f201e8578b083899f4053a7b2fd.jpeg)

![Носитель не может быть загружен, потому что формат не поддерживается [fix]](https://kubwheel.ru/wp-content/uploads/f/f/a/ffa3bb2cb42298c83a03c06d3e6b9734.jpeg)

![The media could not be loaded error in chrome [fix]](https://kubwheel.ru/wp-content/uploads/3/f/a/3faa136a3ebe346fa2a1ed8a52dab862.png)

![[решено] не удалось загрузить носитель: формат не поддерживается](https://kubwheel.ru/wp-content/uploads/8/5/5/85585b90e5b0b39712955580474280b0.jpeg)
![Носитель не может быть загружен, потому что формат не поддерживается [fix] - gadgetshelp,com](https://kubwheel.ru/wp-content/uploads/d/6/e/d6edea81a398a7930502a521b220beed.jpeg)
![[решено] не удалось загрузить носитель: формат не поддерживается](https://kubwheel.ru/wp-content/uploads/f/e/0/fe0242529ecac6e72bfaa4258f9bf7a9.jpeg)
So, if everything fails to fix the ‘The media could not be loaded because the format is not supported’ error message while playing a video, you could try a different browser.
So, these are the best methods to fix the ‘The media could not be loaded, either because the server or network failed or because the format is not supported’ error message. Let us know in the comment box below if you know of any other method to fix the error.
7. Clear Your Browser’s Cache and History
The cached data speeds up the loading of webpages by storing some on-site elements from the previous visit. However, it piles up when left unchecked and adversely impacts browser performance. Hence, it is imperative to clear the cache to prevent cache inference.
To clear Chrome’s cache and history, follow these steps:
- Press Ctrl + H to open Chrome’s History page.
- Click on Clear browsing data on the left-sidebar.
- Check the boxes for Browsing history, Cookies and other site data, and Cached images and files.
- Hit the Clear data button.
It is also possible to clear history in other browsers similarly. After clearing it, try accessing the video on the webpage again. Is the error persisting?
This Browser Does Not Support Video Playback FIX [Tutorial]
Why is my Zoom video not working?
Zoom is a video conferencing service that uses the Internet to make voice and video calls. Zoom may not be working because of an issue with your Internet connection or your Zoom account. If you’re using a phone, make sure that the Zoom app is up to date and that your phone is connected to the same network as your computer.
Why is my Zoom recording not showing video?
Zoom can sometimes record video but not show it on the app. This is usually because the video was recorded in an unsupported format or the file is too large. If you’re having trouble recording video, make sure your phone and Zoom are both updated and try using a different recording format.
How do I enable video on Zoom?
Zoom does not natively support video. To enable video, you will need to install a third-party video player such as VLC. Once installed, open the video player and click on the gear icon in the top right corner. In the settings menu, select “Video Output”. Under “Video Format”, select “H.264/MPEG-4 AVC”. Click on the “OK” button.
Why my video is not working?
There are a few potential reasons why your video might not be working. The most common issue is that the video is not hosted on YouTube or another video hosting platform. If you’re using a third-party video hosting service, make sure to check the settings to make sure that the video is properly uploaded and accessible. In some cases, videos may not be playable because of copyright issues. If you’re experiencing problems with playback on your end, please reach out to YouTube for help.
Why does Zoom say failed to start the video camera?
Zoom may say “failed to start the video camera” if there is a problem with the camera’s power supply, memory card, or lens.
How do I get rid of black bars on Zoom?
Zoom can be a little frustrating when it comes to black bars. There are a few things you can do in order to get rid of them.First, make sure your video is properly formatted. Zoom will only recognize videos that are in the MP4, MOV, or AVI formats. If your video is not in one of these formats, you will need to convert it before you can use Zoom.Second, make sure your video is properly sized.
How do I access Zoom recording?
There are a few different ways to convert a .Zoom file. You can use a free online tool like Zoom by Zinio, or you can use an app like Photos by Google.
How do I convert a .Zoom file?
Zoom may say “failed to start the video camera” if there is a problem with the camera’s power supply, memory card, or lens.
How do I test my video camera?
There are a few ways to test your video camera. One way is to take a picture of a white screen and see if the picture comes out clear. Another way is to take a picture of yourself and see if the picture comes out clear.
Can you be on Zoom without being seen?
Yes, you can be seen on Zoom if you are broadcasting or if someone is in the room with you while you are broadcasting.
Can I test Zoom by myself?
Yes, you can test Zoom by yourself. Zoom has a self-service platform that allows users to create and manage their own projects.
How can I fix my camera error?
There are a few things you can do to try and fix your camera error. First, make sure that the battery is fully charged. Next, clear the camera’s memory by deleting any pictures or videos that you don’t want to keep. Finally, try resetting the camera by turning it off and then on again.
What are the common video errors?
There are many common video errors, but here are a few of the most common:-Incorrect framing -The camera may be placed in the wrong place or at the wrong angle, resulting in an incorrect view of the scene.-Out-of-focus shots -Shots that are out of focus can ruin the overall look of a video.-Motion blur -If there is too much movement in the scene, the video will be blurry.
Why won’t videos play on my laptop?
There are a few potential reasons why videos might not be playing on your laptop. One possibility is that the video is too large to fit on the current screen size. If you’re using an older laptop with a smaller screen, you might need to downsize the video before it can be played. Another possibility is that your laptop doesn’t have the necessary hardware to play the video.
What happened to my Zoom recording?
Zoom can be a great way to record meetings, lectures, or other important events. Unfortunately, Zoom can also be a great way to lose important recordings. If you’re having trouble retrieving your recordings, there are a few things you can do. First, make sure that your Zoom account is updated and current. If you’ve recently changed your password or registered for an account, make sure to enter the new information into your Zoom account.
Tackle slow internet related issues
Before going any further, it is better to handle the internet connectivity-related reasons. Try loading another webpage on Chrome and see if loads successfully. If it doesn’t you are currently facing internet connectivity issues. Try to restart the router to solve the issue. You can also contact the ISP to resolve the connectivity problems.
If the internet is not the culprit here, try to be fixes given below.
Refresh the Webpage
While this may seem basic, try refreshing the webpage as it may have run into a random glitch for the first time. You can also try restating the video along with the webpage. Try closing the web browser and then launch it again. Now load the webpage and see if it works.
Also Read: Google Chrome’s Tips And Shortcuts For Better Browsing Experience
Update Chrome
An outdated web browser is known to cause several weird issues like the one we are currently facing. So it is essential to keep Chrome updated. If you have disabled the auto-update feature of Chrome, you should enable it. Besides, you can update your browser manually using the following steps:
- Tap the three vertical dots on the top-right corner to reveal a drop-down menu.
- Choose the Help option and then click on the About Google Chrome option.
- Now the browser will automatically search for the available updates and will install the updates.
- If you are using the latest version of Chrome, then you can skip this step and try the next one.
Disable or Enable VPN
While VPNs are essential to protect your privacy, sometimes, they interfere with your browsing experience. So, if you are using a VPN on your browser, it can be a probable cause why you are unable to watch the video.

![[solved] the media could not be loaded in chrome on pc? - minitool partition wizard](https://kubwheel.ru/wp-content/uploads/7/9/c/79c76dc4d9b648682ba4da97b65b15d3.png)
![[fixed] the media could not be loaded error in chrome page 1 of 0](https://kubwheel.ru/wp-content/uploads/d/6/b/d6b060258250e3dde5ba59d577b99a8f.png)

![The media could not be loaded browser error [solved]](https://kubwheel.ru/wp-content/uploads/9/1/2/912765ee3ef00d42afb81d117fe62192.jpeg)
However, the reverse is also true. If you are in a location where a particular video is restricted, you can enable a VPN on your device to watch that video.
Also Read: 5 Wordle Chrome Extensions For Hints And Solutions
Clear Browser Cache and History
If the above methods did not work, the issue can be because of the corrupted browser cache. While cache data cuts down the webpage loading time, it can also cause havoc when too much of it collects on your device. As a result, it poorly impacts the performance of the browser. So let’s clear the browser cache and cookies to solve the error:
- Open the Chrome History using the Ctrl+H shortcut.
- Now choose the Clear browsing data option on the sidebar.
- In the pop-up, tick the boxes preceding Browsing history, Cookies, and other site data, and Cached images and files options.
- Finally hit the Clear Data button.
Wait until you wipe out all the data, visit the webpage again. If the issue isn’t solved yet, there are plenty of fixes left to try.
Also Read: 6 Ways To Fix Audio Issues In Chromecast
Disable Ad-blocker Extensions
Ad-blockers are browser extensions that bar advertisements on websites. They do so by interfering with the website’s JavaScript. This maneuver can result in the website not loading the content properly and even interfering with the HTML tags such as <video>. To rule out this cause of the issue, you can disable these ad-blockers for time being.
Follow the steps given below to disable ad-blockers:
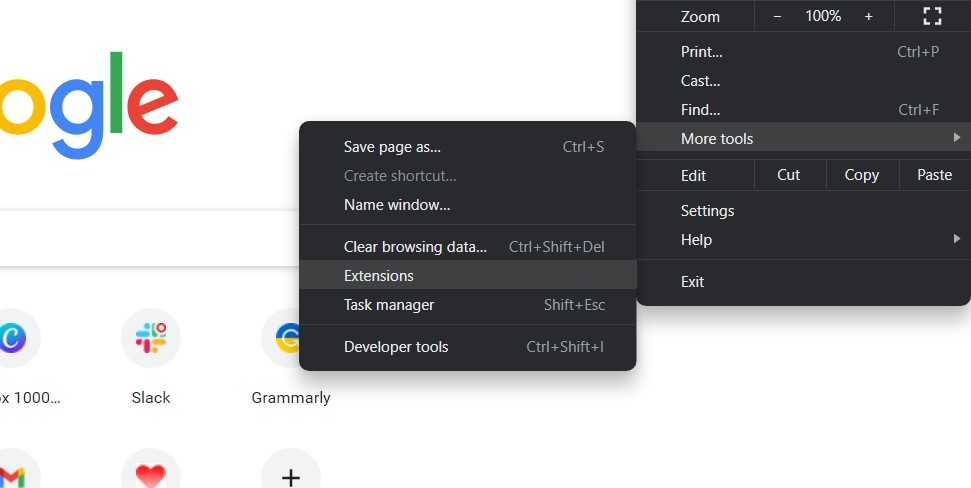
- Tap the three vertical dots on the top-right to access the menu.
- Hover More Tools to reveal a sub-menu. Choose Extensions from it.
- In the next window, choose ad-blocker extensions among the list of all the installed extensions.
When you find it, turn off the toggle for the extension or uninstall it completely by pressing the uninstall button next to it.
Now try playing the video, most probably it will play without the error.
Reset Chrome
If the issue still exists, it’s time to reset the Chrome browser. Doing so will revert all the settings to default. However, you can go back and make the customizations later on after the issue is resolved.
Here’s how to reset the browser:
- Hit the three vertical dots on the browser.
- Choose Settings from the drop-down menu.
- In the Settings window, choose the Advanced option from the sidebar.
- Now, hit the Reset and clean up button on the right pane.
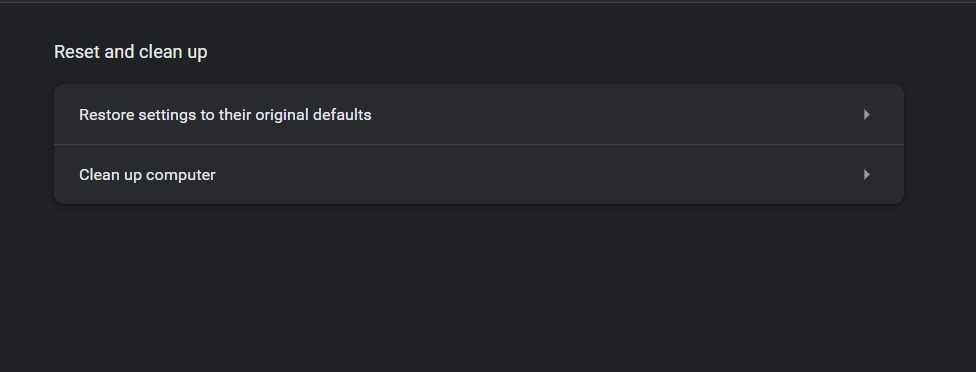
- Finally, press the Restore settings to their original defaults button.
- Finally, hit the Reset Settings option.
Also Read: How To Reduce Image Size Directly On Chrome Browser
Wrapping Up
That’s all to it! Hopefully, the “The Media Could Not Be Loaded” Error in Google Chrome is resolved now. If not, the only option left to try is to uninstall the browser and then reinstall it later on. With this, signing off.
User Questions:
1. What should I do if the format I’m using isn’t supported?
If your media player is incompatible with your file format and you do not want to change media players, changing the file format is another option. Converting the file format to one that is more compatible and allowed by the media player should allow you to play the file successfully.
2. When a video indicates “format not supported,” what does it mean?
The most common cause of a “can’t open file,” “unsupported audio codec,” or “unsupported video format” error message is that the file is corrupted “The problem occurs because the codec of your video file is not supported by your current media player.
3. Why is it saying that media cannot be loaded?
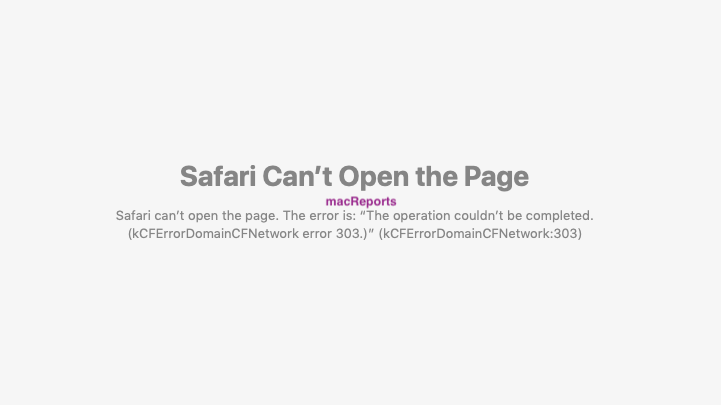
The media could not be loaded due to a server or network failure, or because the format is not supported, according to the complete notification. Because this problem is frequently related with Chrome, you may want to upgrade it or switch to another browser.
4. The media could not be loaded, either because the server
5. Getting the error message “the media could not be loaded
Table of Contents
Why is Zoom not picking up my camera?
When you run into the issue, you should suspect any of the following: Zoom doesn’t have the camera selected. The device camera is being used or used in the background by another application. The Zoom app that you are using is out-of-date.
Currently, many people’s lives are completely dependent on Zoom meetings. Zoom is not error-free, though, like all other technological tools. Zoom camera problems are among the most annoying problems users encounter.
The camera not working in Zoom issue can be very concerning, whether you are hosting a webinar, participating in an online class, or having a scheduled team meeting.
But do not worry. It’s not just you. In order to help you move forward, this article will walk you through 7 different ways to fix the Zoom camera problem.
The media could not be loaded, either because the format is not supported safari – (Image Source: Pixabay.com)
11. Reset Chrome
If none of the above fixes work, it’s best to reset Chrome. It will revert all the changes you’ve made to the settings so far, eliminating the possibility that customizing them is causing the problem. It will, however, revert all customizations, so you’ll have to start setting up the browser from scratch. Be aware of that risk before you reset it.
To reset Chrome, follow these steps:
- Click on the three vertical dots in the top-right corner.
- Go to Settings.
- On the left sidebar, click the Advanced drop-down menu.
- Click on the Reset and clean up button.
- Click on Restore settings to their original defaults.
- Then click on Reset settings.
If resetting the browser doesn’t work, consider reinstalling the browser from scratch as a last resort.
5. Update Chrome
An outdated browser can often lead to the issue in question. Consequently, if you keep the Chrome auto-update setting disabled, it might be time to activate it and update your browser manually.
- If you are unsure if your browser is updated, click on the three vertical dots in Chrome’s top-right corner.
- Navigate to Help > About Google Chrome.
- If the browser isn’t updated with the auto-updates not turned off, it will automatically search for available updates and update itself to the latest version.
- Enable Chrome auto-updates to prevent the same issue from occurring again. If Chrome is already on the latest version, you will see a message saying, «Chrome is up to date.»
The message ensures that outdated Chrome wasn’t causing the trouble. The next step would be to check whether you’re accessing the video on the webpage using a VPN.
Что это за ошибка
«Ошибка при загрузке медиа: Файл не может быть воспроизведен» очень часто имеет связь с реестром системы. Возможно, совсем недавно производились масштабные работы по удалению или установлению софта. При удалении не все файлы могли быть убраны в корзину, что конечно создает немало проблем для нормальной работы Windows.
Ошибка при загрузке медиа: Файл не может быть воспроизведен
Еще не нужно забывать про разные трояны и вирусные программы. Угонщики браузеров активно используют сеть для передачи данных, а значит, потоковые видео могут отображаться не корректно. Также следует упомянуть про наличие актуальных обновлений самого браузера и медиа-плагинов на компьютере.
How do I fix unsupported media formats?
Quick solution. The quickest way to fix the “not supported audio or article codec error on Android is by using the VLC Media Player app. VLC has extended codecs to play files such as MKV, MOV, WMV, etc. However, other ways exist to play the article in the native Android player.
Unsupported audio/video codec is an error that pops up when the article player can’t play the audio or article of a file on Android.
If the issue is with the audio, you get an audio error, and with the article, you get a article error. If that’s what you are facing, here are three fixes for the unsupported codec issue.


![[solved] the media could not be loaded in chrome on pc?](https://kubwheel.ru/wp-content/uploads/c/c/6/cc6d4203ac4e50dedfb336f157858cd2.jpeg)


The VLC Media Player app is the quickest way to resolve the not supported audio or article codec error on Android.VLC has extended codecs to play files such as MKV, MOV, WMV, etc.
9. Disable Ad-Blocker Extensions
Ad-blocker extensions block the advertisements on websites by directly interfering with the site’s script. Such interference can also result in some site content not loading correctly or preventing HTML tags such as <video> tag from running, resulting in the error we’re discussing. Temporarily disabling such extensions may help resolve the problem.
To disable an ad-blocker extension, follow these steps:
- Click on the three vertical dots in the top-right corner.
- Go to More tools > Extensions.
- Find the ad-blocker extensions in the installed extensions.
- Use the toggle to disable the extension, or hit Remove to uninstall it from Chrome.
If disabling ad-blocker extensions fails to resolve the issue, there are a few more things that you can try.
How do I give Zoom permission to use my camera?
You will be prompted to grant Zoom access to the camera and microphone if this is your first time joining a Zoom meeting from this device. dot. Android: Log into the Zoom app on a mobile device. Select the Meetings tab, then select New Meeting. For it to be active, tap the article toggle. Start a Meeting can be started by tapping.
You can manually test your article camera with Zoom before joining a meeting—or during a meeting—to ensure that the camera is working properly. A demo Zoom meeting can also be started.
You can start an immediate meeting to check your article using the Zoom mobile app for Android.
If this is your first time joining a Zoom meeting from this device, you will be asked to allow Zoom permission to access the camera and microphone.
The media could not be loaded safari – (Image Source: Pixabay.com)
How do I fix the error “Error loading media file: cannot be played?
Here are some easy solutions you can try to fix the error on your PC, Mac, or Android phone: Fix your Internet connection. Reset your browser settings. Update to the latest version of the browser. Delete cache, cookies, and browser history. Play the media file in incognito mode. Turn off hardware acceleration.
Summary: Are you facing an “Error in Loading Media: File Could Not Be Opened’ message when trying to watch online articles? Learn how to fix this media file error in Chrome, Firefox, Safari, and other browsers on Windows, Mac, and Android.
You have just enrolled in a self-paced open online course to learn a new skill or to complete your degree while in-between jobs, or to watch Billboard’s Top 100 picks to soothe your soul after a long, tiring day. Be it for solace or for mere self-help, articles have made a significant impact on our lives and have flooded websites and social media outlets.
However, things may come to an abrupt halt when, while playing a article on the host website, the screen throws a message: “Error in Loading Media: File Could Not Be Opened’. This error, although commonly reported in Chrome, can occur in any browser, including Mozilla Firefox, Internet Explorer, Safari, Opera, or others.
How to Fix “The Media Could Not Be Loaded” Issue when Loading Images in Google Chrome Browser
The complete error message that might show on your computer or mobile device screen says: “The media could not be loaded, either because the server or network failed or because the format is not supported.” The problem might also surface on other popular web browsers such as Opera, Firefox, Microsoft Edge, or Brave.

To fix this error, the first thing you should do is try to reload the website page you’re accessing. This can often resolve the issue and allow the media to load properly. To do this, simply click the reload button in your browser (the circular arrow icon) or press the “F5” key on your keyboard.
Solution #1 – Clear Chrome Browser Cache Cookies Data
If this doesn’t work, you can also try clearing your browser’s cache and cookies. Over time, your browser can accumulate a lot of temporary files and browsing data that can cause problems with loading media. By clearing this data, you can often fix the “The Media Could Not Be Loaded” error and get your media to load properly.
- To clear your cache and cookies in Google Chrome, click the three dots in the top-right corner of the browser and select “Settings.”
- In the “Privacy and security” section, click “Clear browsing data.”
- From here, you can choose the time range and the types of data you want to clear.
- Make sure to select both “Cookies and other site data” and “Cached images and files.”
Solution #2 – Update your Google Chrome Browser App to Latest Version
Another potential solution to the “The Media Could Not Be Loaded” error is to update your browser. Outdated browsers can sometimes have issues loading media, so it’s always a good idea to make sure you’re using the latest version of your browser.
- To update Google Chrome, click the three dots in the top-right corner of the browser and select “Help,” then “About Google Chrome.”
- This will open a new tab where you can check if there are any updates available.
If there are any pending upgrades, Chrome will automatically download and install them, and you’ll need to restart the browser to apply the update changes.
Solution #3 – Disable Chrome Browser Extensions Currently Installed
If you’re still having trouble with the “The Media Could Not Be Loaded” error, you can try disabling any extensions or plugins you have installed in your browser. These extensions can sometimes cause conflicts or interfere with the loading of media, so disabling them can often fix the error.
- To disable extensions in Google Chrome, click the three dots in the top-right corner of the browser and select “More tools,” then “Extensions.”
- This will open a new tab where you can see all the extensions you have installed.
- To disable an extension, simply click the toggle switch next to it to turn it off.
If none of these solutions work for you, there may be a problem with the website or the media file itself. In this case, the best thing to do is to contact the website’s support team and let them know about the issue. They may be able to provide further assistance or troubleshooting steps to help you fix the “The Media Could Not Be Loaded” error.
In conclusion, the ‘The media could not be loaded’ browsing problem in Google Chrome can be annoying, but it can frequently be resolved by refreshing the page, deleting your cookies and cache, updating your browser, turning off extensions, or contacting the website’s support staff. These instructions will help you get your media to load correctly so you can continue to enjoy your favourite websites uninterrupted.